
- All
- Product Name
- Product Keyword
- Product Model
- Product Summary
- Product Description
- Multi Field Search
- Product private attributes
Views: 0 Author: Site Editor Publish Time: 2026-10-19 Origin: Site


The transition from static, single-temperature halogen lighting to dynamic, smart-controlled landscapes has made 12V systems the industry standard for residential and commercial exteriors. While low voltage systems are safer to install than line-voltage alternatives, integrating multi-color LED technology introduces complex variables. Poor voltage management, incorrect wire sizing, AC vs. DC power mismatches, and inadequate waterproofing lead to visible color shifting, controller latency, and premature fixture failure.
This guide provides a technical roadmap for designing, evaluating, and installing a reliable 12V color-changing system. We will show you how to ensure consistent power delivery and seamless smart home integration from the transformer to the final fixture. You will learn field-tested methods to eliminate common failure points before you even break ground.
Voltage Drop is Critical for Color Accuracy: Unlike standard white LEDs that simply dim, RGB fixtures will display incorrect colors (often shifting to red or pink) if voltage drops below 10.5V at the end of a run.
AC vs. DC Power Compatibility: Many smart RGB controllers require 12V DC power to function correctly, whereas traditional landscape transformers output 12V AC. Verifying power type is a mandatory first step.
Transformer Sizing Requires a 20% Buffer: Total fixture wattage must not exceed 80% of the transformer’s maximum capacity to accommodate startup surges and future expansions.
Topology Dictates Performance: Utilizing a "hub" or "T-tap" wiring method is vastly superior to a traditional "daisy chain" for maintaining consistent voltage across smart fixtures.
Waterproofing is Non-Negotiable: 90% of low voltage system failures occur at the splice points; direct-burial, silicone-filled wire nuts are mandatory for long-term reliability.
Failing to plan the electrical load, power type, and wire routing before purchasing equipment results in overloaded transformers, incompatible controllers, and uneven lighting. Proper system architecture guarantees that every diode receives the exact voltage required to render accurate colors. Planning your RGB Outdoor Lighting layout on paper saves hours of troubleshooting in the field.
Traditional landscape lighting relies on magnetic transformers that step down 120V household current to 12V alternating current (AC). Halogen bulbs and basic single-color LEDs run flawlessly on AC power. However, modern multi-color systems introduce microprocessors and wireless receivers into the mix. Most individual smart RGB controllers require 12V direct current (DC) power to process color-changing commands without flickering or dropping off the network.
Connecting a DC-only smart controller directly to an AC transformer will instantly fry the controller's internal circuitry. You must verify the input requirements of your specific smart devices. If you are retrofitting color-changing fixtures onto an existing AC landscape system, you must install inline AC-to-DC rectifiers before the smart controller. Alternatively, you can replace the legacy magnetic transformer with a modern DC power supply designed specifically for smart LED applications.
Overloading a transformer causes excessive heat, trips internal breakers, and shortens the lifespan of the unit. Smart LEDs also draw a brief surge of power when initially turned on or when switching to full-brightness white. To calculate your required transformer size, add up the maximum wattage of every fixture on the run, then divide that number by 0.80.
For example, if you plan to install fifteen 6-watt fixtures, your total load is 90 watts. Dividing 90 by 0.80 yields 112.5. You must purchase a transformer with a minimum capacity of 120 watts or 150 watts. When selecting the unit, you will choose between toroidal core transformers and electronic transformers. Toroidal models are heavier, highly durable, and typically output AC power. Electronic transformers are compact, often feature integrated smart controls, and usually output DC power. Choose the type that aligns with your specific fixture requirements.
Voltage drop is the natural decrease in electrical pressure as current travels along a wire. In standard white LEDs, a drop from 12V to 10V simply causes the bulb to dim slightly. In color-changing systems, voltage drop causes immediate visual issues. Blue and green diodes require higher forward voltage to illuminate than red diodes. If the voltage at the end of your wire run drops below 10.5V, the blue and green diodes fail to ignite fully. The resulting light will shift heavily toward red or pink, destroying the intended color scene.
Wire gauge selection is your primary defense against voltage drop. The thicker the copper wire, the less resistance it offers. Use a 12/2 AWG cable for standard runs under 100 feet with moderate wattage. For runs exceeding 100 feet, or heavily loaded circuits carrying over 150 watts, you must upgrade to 10/2 AWG cable. Never use 14/2 or 16/2 wire for main trunk lines in a smart lighting system.
The physical layout of your wire directly impacts voltage distribution. The daisy chain method involves running a single wire from the transformer to the first fixture, then to the second, and so on. While this uses less wire, it compounds voltage drop. The final fixture in a daisy chain receives significantly less power than the first, leading to high risks of color shifting.
The hub or center feed method works much better for smart lighting. In this topology, you run a heavy-gauge main trunk line to a central point in the yard. From that central hub, you run shorter, equal-length wires to individual fixtures. This equalizes the voltage across all fixtures, ensuring that every light receives the same power and displays the exact same color. While the hub method requires more cable and careful trench planning, it guarantees consistent performance.
Achieving a layered landscape lighting design requires selecting the correct form factors for specific applications. Prioritize material longevity when evaluating fixtures. Solid brass and cast aluminum housings dissipate heat efficiently, protecting the internal LED drivers. Composite or cheap plastic housings degrade rapidly under UV exposure and trap heat, leading to premature diode failure.
Flood lights deliver broad, powerful illumination designed to cover large surface areas. They are the primary tool for wall washing, silhouetting, and uplighting mature trees or large architectural features. When selecting 12V RGB landscape flood lights, evaluate the lumen output requirements. A standard single-story wall wash requires 400 to 600 lumens, while illuminating a 40-foot oak tree demands 800 lumens or more.
Beam angle selection is equally important. A narrow 15° to 25° beam creates a tight, focused column of light ideal for flagpoles or tall, narrow trees. A wide 45° to 60° beam spreads the light horizontally, making it perfect for grazing wide retaining walls or dense hedges. Ensure the fixture housing features deep cooling fins. Color-changing diodes generate significant heat, and thermal management dictates the lifespan of the fixture.
Pebble lights, often used as low-profile path lights or well lights, provide subtle illumination without dominating the landscape. They are utilized for pathway illumination, defining garden bed borders, and low-level ambient lighting. When deploying 12V RGB outdoor pebble lights, glare reduction is the primary design consideration. The light source should be shielded from the direct line of sight of pedestrians.
Optimal spacing typically falls between 6 to 8 feet apart. Placing them closer creates a runway effect, which looks cluttered and unnatural. Staggering the lights on opposite sides of a pathway provides balanced illumination. Because these fixtures sit flush with or very close to the ground, they must withstand foot traffic, lawnmowers, and string trimmers. Look for thick tempered glass lenses and heavy-duty composite or brass bezels.
Sphere lights serve as modern, omnidirectional luminous orbs that add geometric interest to a landscape. They are highly effective as focal point accents, patio perimeters, and water feature surrounds. When integrating 12V RGB LED sphere lights, waterproof ratings dictate placement. An IP67 rating allows for temporary submersion, making it suitable for garden beds that occasionally flood. An IP68 rating is required if the sphere will float in a pool or sit permanently inside a pond.
The diffusion material must be heavily UV-resistant. Cheap plastics will yellow and become brittle after a single summer of sun exposure, ruining the color accuracy of the internal LEDs. Mounting stability is also a factor. Spheres placed in loose soil or mulch require deep, robust ground stakes to prevent them from shifting out of alignment during heavy rain or high winds.
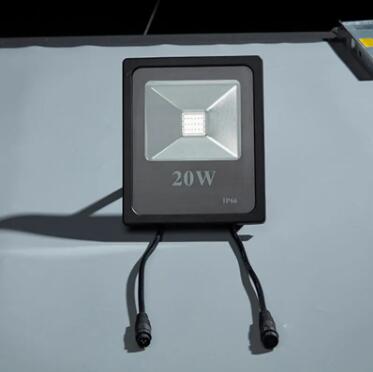
Translating your system design into physical installation requires adhering to strict electrical best practices. Rushing the physical installation introduces weak points that will fail during the first heavy rainstorm or winter freeze.
Do not begin the installation without the proper equipment. You will need a digital multimeter to verify voltage levels across the system. Heavy-duty wire strippers are required to cleanly remove the thick insulation from 12/2 direct burial cable without scoring the inner copper. A narrow trenching spade allows you to bury wire with minimal disruption to existing turf. Silicone-filled direct burial wire nuts are mandatory for all splices. Finally, a rubber mallet is necessary for driving ground stakes without shattering the fixture mounts.
Never bury a single foot of wire until the entire system is fully operational above ground. Lay out all your main trunk lines and connect every fixture loosely at its intended location. Connect the system to the transformer and power it on. This above-ground testing phase allows you to identify dead fixtures, reversed polarities, or faulty controllers immediately.
Use your digital multimeter to test the voltage at the transformer terminals. Then, walk to the absolute furthest fixture on the run and test the voltage at that splice point. Verify that the reading remains above 10.5V. If it drops below this threshold, you must upgrade your wire gauge or shorten the run before burying the cable. This is also the optimal time to sync your smart controller to the local Wi-Fi network, as the fixtures and controller are easily accessible for resetting if necessary.
Total Wattage Load | 0 - 50 Feet | 51 - 100 Feet | 101 - 150 Feet |
|---|---|---|---|
Up to 40W | 16/2 AWG | 14/2 AWG | 12/2 AWG |
41W - 80W | 14/2 AWG | 12/2 AWG | 10/2 AWG |
81W - 120W | 12/2 AWG | 10/2 AWG | 8/2 AWG |
121W - 160W | 12/2 AWG | 10/2 AWG | Not Recommended |
Low voltage wire does not carry the strict depth requirements of 120V line voltage. Standard building codes typically require low voltage landscape wire to be buried exactly 6 inches deep. This depth protects the cable from standard lawn aeration and edging tools while remaining easy to trench.
When navigating hardscaping, do not attempt to force wires through tight cracks. Use a long masonry drill bit to create clean pathways, or lift pavers to run the wire underneath. For runs crossing under concrete pathways, drive a rigid PVC pipe horizontally beneath the concrete to act as a protective sleeve. Never cut through thick tree roots. Route the wire around the drip line of mature trees to prevent damaging the root system and to avoid future wire tension as the roots grow.
Standard electrical tape and indoor wire nuts will fail underground within months. Soil moisture causes rapid galvanic corrosion on exposed copper, leading to flickering lights and total system failure. To execute a weatherproof splice, follow these exact steps:
Use heavy-duty strippers to remove exactly 5/8 of an inch of insulation from the wire ends.
Inspect the exposed copper. If you scored or cut any copper strands during stripping, cut the wire and try again.
Align the stripped wire ends and twist them together clockwise.
Insert the twisted copper into a silicone-filled direct burial wire nut.
Push the wires deep into the nut until the silicone sealant oozes out slightly from the bottom, ensuring a completely watertight seal.
For maximum reliability, wrap the base of the wire nut and the protruding wires in marine-grade heat-shrink tubing. This creates a secondary physical barrier against moisture and prevents the wires from pulling apart under ground tension.
Securing ground stakes properly prevents fixtures from leaning over time. In hard clay soils, soak the ground with water an hour before installation to soften the earth. Use a rubber mallet to drive the stake perfectly plumb. Never strike the top of the light fixture itself. In loose sandy soils, you may need to dig a wider hole, insert the stake, and backfill with crushed gravel to provide adequate lateral support.
Always leave a service loop at the base of every fixture. A service loop is simply 2 to 3 feet of excess wire coiled loosely in the dirt beneath the light. This slack allows you to move the fixture slightly as adjacent plants grow and block the light over the years. It also prevents the wire connections from snapping during winter frost heave, which naturally pushes fixtures upward.
A smart lighting system is only as reliable as its control interface and network connection. Beautiful fixtures are useless if the app fails to connect or the lights ignore scheduling commands.
You must decide where the brain of your system will reside. Systems with built-in Wi-Fi at the transformer offer a clean installation with fewer components. However, transformers are typically mounted on the side of a house or behind a garage, areas notorious for weak Wi-Fi signals. If the transformer loses network connection, the entire lighting schedule fails.
Inline controllers are placed downstream in the yard, connecting between the transformer and the fixtures. This allows you to position the controller closer to your indoor router or an outdoor access point. If you use standalone inline RGB controllers, they must be housed in NEMA-rated weatherproof enclosures. Moisture intrusion in a smart controller will instantly destroy the microprocessors.
The communication protocol dictates how you interact with your lights. Wi-Fi offers high bandwidth, allowing for complex color scenes and remote access from anywhere in the world. However, Wi-Fi is highly vulnerable to weak outdoor router signals and interference from exterior walls.
Bluetooth provides highly reliable local control. You can change colors and set schedules instantly while standing in your yard. The drawback is a lack of remote access. You cannot adjust your lights while away on vacation. Mesh networks, utilizing protocols like Zigbee or proprietary RF, are best for large estates. In a mesh network, each fixture acts as a repeater, relaying the signal to the next fixture. This extends the range massively and eliminates dead zones at the far edges of the property.
Advanced landscape designs require zone control. You do not want your pathway lights flashing the same bright colors as your architectural wall washes. Evaluate the manufacturer's smartphone app for grouping capabilities. A robust app allows you to separate front yard floods from backyard spheres, assigning different colors and schedules to each zone.
Instead of relying on outdated physical photocells that turn lights on when it gets dark, utilize the astronomical timer feature in your smart app. Astronomical timers sync with your local zip code to determine exact sunrise and sunset times, adjusting automatically throughout the year. This ensures your lights turn on at the precise moment dusk falls, regardless of daylight saving time changes or overcast weather.
Even perfectly installed systems occasionally require maintenance. Identifying and resolving the most common post-installation failures quickly prevents minor issues from cascading into hardware damage.
The most common complaint in multi-color systems is fixtures at the end of a run displaying yellow or pink instead of pure white or blue. This is the primary indicator of voltage drop. The final fixture is starved of the electrical pressure needed to power the blue diodes.
To resolve this, you have three options. First, you can upgrade the entire wire run to a thicker gauge. Second, you can split the single long run into two separate zones, running a new dedicated wire from the transformer to the second half of the lights. Third, you can move the transformer closer to the center of the load, reducing the overall distance the current must travel.
If your app shows the controller as offline frequently, you are experiencing signal interference. Brick walls, metal siding, stucco wire mesh, and dense wet foliage all absorb wireless signals. Do not blame the controller immediately. Test the signal strength at the controller's location using your smartphone.
If the signal is weak, install an outdoor-rated Wi-Fi extender on the exterior wall closest to the controller. Ensure your smart devices are connecting to a dedicated 2.4GHz network. Smart controllers rarely support 5GHz networks, and combined dual-band routers often confuse the devices, causing them to drop off the network repeatedly.
Physical environment factors degrade lighting systems over time. In colder climates, the freeze-thaw cycle of the soil creates frost heave. The expanding ice literally pushes ground stakes upward, pulling the fixtures out of the ground and straining tight wires. If you did not leave a service loop during installation, this tension will rip the splices apart underground.
Routine maintenance is required to keep the system looking new. Hard water from irrigation sprinklers leaves white mineral deposits on the glass lenses, severely reducing lumen output and distorting colors. Clean the lenses twice a season with a mild vinegar solution. Additionally, inspect the base of each fixture after heavy rainy seasons to ensure soil erosion has not exposed the wire splices to direct sunlight or lawnmower blades.
Map your property layout on paper and calculate the total wattage of all desired fixtures before buying equipment.
Select a central location for the transformer and purchase a unit with at least a 20% capacity buffer above your calculated load.
Verify the AC or DC power requirements of your specific smart controllers and fixtures to prevent electrical damage.
Lay out all wiring above ground and test the voltage at the furthest fixture to confirm it remains above 10.5V before digging any trenches.
Execute every underground connection using silicone-filled direct burial wire nuts to ensure long-term, weather-resistant reliability.
A: Yes, provided the total wattage does not exceed the transformer's capacity and the power output matches the requirements of both fixture types. Standard white lights will not respond to the color-changing commands of the smart controller and will remain static.
A: This is caused by voltage drop. Color-changing LEDs require a minimum voltage of around 10.5V to power all red, green, and blue diodes equally. If voltage drops below this threshold, certain colors fail to illuminate, causing a visible color shift.
A: For runs under 100 feet with a total load under 100 watts, 12-gauge (12/2) wire is standard. For longer runs or higher wattages, upgrading to 10-gauge (10/2) wire is necessary to prevent voltage drop and maintain color accuracy.
A: They require a standard 12V AC or DC landscape transformer depending on the specific fixture's requirements. The smart aspect is typically handled by a controller built into the transformer or an inline module, not the power supply itself. Always verify if your specific spheres require DC power.
A: Low voltage landscape wire should typically be buried 6 inches deep. This depth protects the cable from routine lawn maintenance like edging and aerating while keeping the trenching process manageable and compliant with most local codes.
A: Disconnections are usually caused by weak Wi-Fi signals penetrating exterior walls. Ensure your controller is connected to a 2.4GHz network, not a 5GHz network. You may need to install an outdoor Wi-Fi extender to stabilize the connection.


