
- All
- Product Name
- Product Keyword
- Product Model
- Product Summary
- Product Description
- Multi Field Search
- Product private attributes
Views: 0 Author: Site Editor Publish Time: 2026-10-14 Origin: Site


Discovering a dark section in your holiday lighting display right as you finish the installation brings immediate frustration. Whether you are dealing with a pre-lit artificial tree in the living room or an expansive outdoor roofline display, dead bulbs interrupt the visual flow and require immediate attention. Many people instinctively grab pliers, screwdrivers, or pocket knives to extract stubborn, corroded bulbs from their sockets. Using makeshift metal tools frequently results in shattered glass, damaged electrical contacts, compromised weatherproofing, and serious safety hazards. Another common hurdle is the missing manual dilemma. Manufacturers often include a tiny plastic bag containing a few spare bulbs and fuses taped to the plug wire. Without the original instruction booklet, figuring out how to separate the spare glass bulb from its generic plastic base to fit your specific light strand becomes a confusing puzzle. You can safely extract and replace dead bulbs using manual, tool-free methods. Successful replacement relies entirely on correctly identifying the base type, verifying the plug fuses first, and utilizing specific hand techniques to protect the fixture's structural integrity.
Safety First: Disconnecting power and utilizing manual grip techniques prevents socket damage and eliminates the risk of shattered glass associated with metal tool usage.
Base Identification is Critical: Matching the exact base size—such as E12 for C7s or E17 for C9s—is mandatory before attempting to force a new bulb into a socket.
Push-In vs. Screw-In Mechanics: Pre-lit trees typically use push-in mini lights requiring a pinch-and-pull method, while outdoor perimeter lights require a push-and-twist technique to bypass socket corrosion.
Husk Retention: For proprietary mini lights, users must often retain the original plastic base (husk) and only swap the internal glass/LED component from the included spare bulbs.
Repair vs. Replace Threshold: If a strand exhibits multiple dead bulbs alongside brittle wiring or blown fuses, upgrading the entire strand to commercial-grade LEDs is often more cost-effective than individual bulb replacement.
A successful bulb replacement restores illumination without compromising the electrical contacts inside the socket or the waterproof seal around the bulb's base. When you swap a bulb, the new unit must seat perfectly against the internal copper tab to establish a solid electrical connection. The exterior plastic housing must remain completely intact to grip the base tightly. Achieving this perfect fit requires preserving the socket's original shape and threading. Manual replacement techniques distribute the force of your grip evenly across the base of the bulb. This allows you to apply just enough torque to break the friction without warping the surrounding materials. If you warp the socket, the bulb will never sit straight again.
Reaching for pliers to twist a stuck outdoor bulb seems like a logical shortcut when you are standing on a cold ladder. However, it introduces severe implementation risks. Pliers apply intense, localized pressure to the fragile glass or hard plastic casing. This pressure creates micro-fractures in the bulb envelope. Even if the bulb does not shatter immediately in your hand, these microscopic cracks allow moisture to enter. This leads to rapid internal corrosion and premature failure. If the bulb does shatter, you are left with a jagged metal base stuck inside a live electrical socket. You then have to kill the breaker and dig out the brass base with needle-nose pliers, turning a five-second swap into a frustrating repair project.
Using a screwdriver to pry a stuck push-in mini light out of its socket is equally destructive. The metal tip of the screwdriver inevitably gouges the soft plastic lip of the socket. This gouging ruins the friction-fit design that holds the bulb securely in place. Shoving a screwdriver into the socket cavity often bends the internal copper contacts out of alignment. Once those contacts are pushed flat or bent sideways, no replacement bulb will ever light up in that specific position again.
When crews resort to hand tools instead of proper manual techniques, we consistently see the same pattern of damage across job sites. Avoid tools to prevent these specific failures:
Shattered glass envelopes leaving jagged metal bases permanently wedged in the socket threads.
Stripped plastic threading inside the socket housing, causing new bulbs to fall out in high winds.
Flattened internal copper contacts that prevent the new bulb from completing the electrical circuit.
Compromised waterproof seals leading to nuisance GFCI tripping during heavy rain or snowmelt.
Many pre-lit trees and premium light strands come with a small, flimsy plastic bulb remover tool. While these tools attempt to solve the extraction problem, relying on them is fundamentally flawed. These accessories are notoriously easy to lose during the off-season. They are often brand-specific, meaning a tool designed for one manufacturer's socket will not fit another. When users try to force a mismatched plastic tool over a bulb, the tool can easily slip. This crushes the glass or snaps the plastic base. Manual grip techniques rely on the dexterity and tactile feedback of your own fingers, making them universally superior across all brands and bulb shapes.
Outdoor lighting relies heavily on its Ingress Protection (IP) rating to survive rain, snow, and ice. The waterproof seal on a holiday light strand occurs exactly where the bulb base meets the socket housing. Damaging the socket casing with tools destroys this critical seal. Even a hairline crack in the plastic threading allows melting snow to seep into the electrical contacts. When moisture bridges the gap between the hot and neutral wires, it causes a short circuit. This trips your exterior GFCI outlets and shuts down the entire display. Tool-free replacement preserves the smooth, unblemished surface of the socket, ensuring the weatherproofing remains completely intact for the duration of the winter.
Before attempting any manual swap, you must physically inspect the dead bulb and identify its specific base type. Forcing the wrong size base into a socket causes permanent structural damage and creates a fire hazard. Holiday lighting generally falls into a few distinct categories based on the diameter of the threaded base or the design of the push-in wedge. Understanding these categories allows you to source the exact Christmas Replacement Bulbs required for your specific installation. If you guess the size, you will likely end up with bulbs that either fall out or crack the socket housing.
Bulb Category | Base Standard | Typical Application | Installation Technique |
|---|---|---|---|
C7 | E12 (12mm) | Residential rooflines, indoor mantles | Push and twist, light torque |
C9 | E17 (17mm) | Commercial perimeters, large outdoor trees | Push and twist, firm torque |
G50 | E12 (12mm) | Patio lighting, globe aesthetics | Base-grip twist (avoid gripping glass) |
Mini Lights | Wedge / Push-In | Pre-lit artificial trees, string lights | Pinch and pull, husk swap |
The C7 bulb is a classic staple in holiday decorating, easily recognized by its smaller, strawberry-like shape. These bulbs utilize the E12 candelabra base standard. The "E" stands for Edison screw, and the "12" indicates a 12-millimeter base diameter. You will typically find these used for residential rooflines, outlining windows, and illuminating indoor mantles. Because the base is relatively narrow, the threads are fine and require careful alignment during installation. When upgrading or repairing these displays, choosing C7 E12 LED replacement bulbs ensures you maintain the traditional aesthetic while drastically reducing the electrical load on your home's circuits. You can measure the base with a standard ruler; if it is roughly half an inch across, you need an E12.
For large outdoor displays, commercial perimeters, and tall exterior trees, the C9 bulb is the industry standard. These bulbs are significantly larger and longer than C7s, providing a bolder visual impact from a distance. They utilize the E17 intermediate base standard, measuring 17 millimeters in diameter. The structural differences between C7s and C9s mean they are completely incompatible with each other's sockets. Because the E17 base is wider, it requires a specific, firm torque when hand-tightening to ensure the bottom contact seats properly against the socket terminal. Utilizing C9 E17 LED replacement bulbs provides the durability needed to withstand harsh winter winds and heavy ice accumulation. The wider base offers a much stronger grip inside the socket.
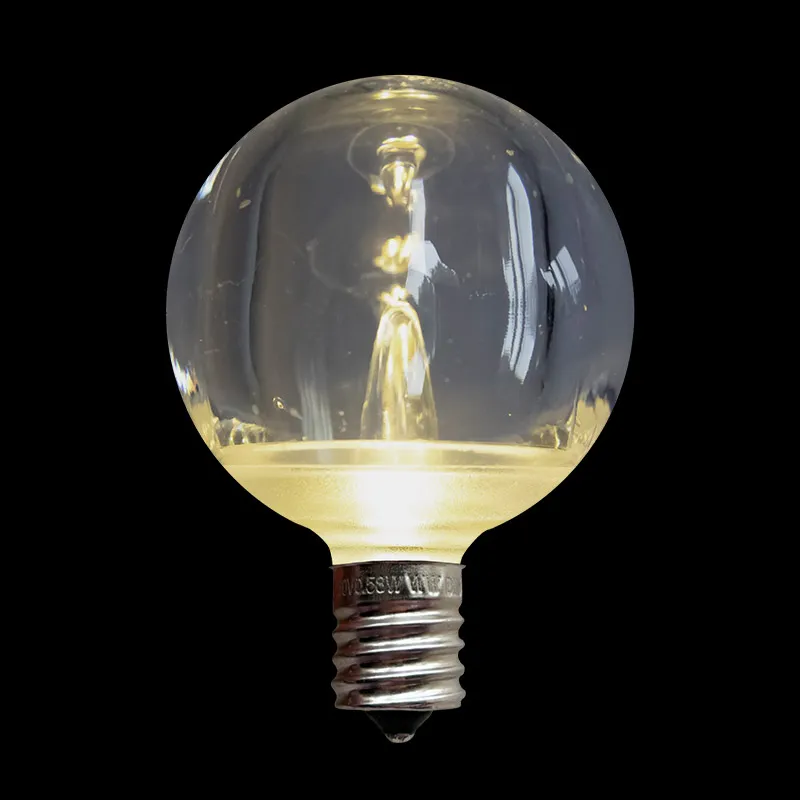
Globe-shaped bulbs offer a distinct aesthetic that crosses over perfectly between holiday decorating and year-round patio lighting. The G50 bulb measures roughly 50 millimeters in diameter, creating a smooth, spherical glow. Despite the larger, heavier glass or plastic envelope, these bulbs often utilize the smaller E12 candelabra base. This creates a unique physical dynamic. When handling G50 E12 LED replacement bulbs, you must exercise extreme caution. Grasping the wide globe and twisting forcefully can easily snap the bulb right off the narrow E12 base. Always apply your twisting force as close to the base as possible to prevent shearing the bulb.
Pre-lit artificial trees and standard string lights utilize push-in mini lights rather than threaded screw-in bases. These wedge bases rely on friction and two tiny external copper wires to make an electrical connection. When a mini light burns out, users often turn to the small bag of spare bulbs taped to the plug. However, the spare bulbs usually come seated in a generic plastic base called a husk. Every manufacturer uses a slightly different exterior husk shape to fit their proprietary sockets. You cannot simply push the generic spare husk into a specialized pre-lit tree socket.
You must separate the spare glass bulb from its generic husk and transplant it into the original husk you pulled from the tree. You must also match the voltage perfectly. Mini lights operate in series, meaning the total voltage of the strand is divided among the bulbs. Replacing a 2.5V bulb with a 3.5V bulb alters the electrical resistance. This mismatch causes the new bulb to burn out immediately or triggers a cascading failure that destroys the entire light string. Always check the white tag near the male plug to verify the exact voltage requirements before swapping anything.
Never attempt to replace bulbs while the light strand is actively plugged into a wall outlet. Unplugging the strand is a mandatory first step to eliminate any risk of electrical shock, especially when dealing with outdoor displays that may be damp. Before you start unscrewing individual bulbs, verify the status of the tiny fuses located inside the male plug. Most standard string lights feature a small sliding plastic door on the plug. Slide this door open to reveal two small cylindrical fuses. If an entire section of the strand is dark, a blown fuse is almost certainly the culprit. Inspect the small wire filament inside the glass fuse. If it is broken or blackened, replace the fuse with a matching spare before worrying about the bulbs.
Outdoor screw-in bulbs frequently become stuck due to dirt, mineral deposits from rain, and slight thermal expansion of the plastic socket. To break this friction without tools, employ the push-and-twist technique. Grasp the bulb firmly at the very bottom of the plastic or glass envelope, right where it meets the socket. Never grab the bulb by the pointed tip. This provides terrible leverage and increases the risk of breaking the glass in your hand.
Apply gentle, steady downward pressure into the socket. This downward push compresses the internal metal contact spring slightly, disengaging the corroded threads from their locked position. While maintaining that downward pressure, twist the bulb counter-clockwise. You will often feel a slight pop or hear a soft click as the friction seal breaks. Continue twisting smoothly until the bulb clears the socket. If your hands are slipping in cold weather, use a dry silicone baking glove or a rubber jar gripper pad. This increases your tactile friction without applying crushing force to the bulb.
Sometimes you insert a brand-new, tested replacement bulb, but it still fails to light up. In these cases, the internal copper contact at the very bottom of the socket has likely been flattened. Over-tightening the previous bulb pushes this flexible metal tab down so far that it can no longer spring back up to touch the base of the new bulb. You must raise this contact to restore the electrical connection.
Explicitly avoid using a metal screwdriver or metal pliers for this task. Even with the strand unplugged, metal tools can easily scrape the conductive plating off the contact or damage the surrounding plastic. Instead, use a non-conductive wooden toothpick or your fingernail. Gently slide the toothpick under the copper tab and pry it upward just a few millimeters. It only needs a slight upward angle to make a solid connection with the bottom of the replacement bulb.
When inserting the new bulb, alignment is crucial. Hold the bulb perfectly straight and gently turn it clockwise. If you feel immediate, heavy resistance, stop immediately. You are likely cross-threading the bulb, which will permanently strip the plastic socket. Back the bulb out, realign it, and try again. The threading should feel smooth and require minimal effort for the first few turns. A tiny dab of dielectric grease on the threads can prevent future corrosion, making next year's maintenance much easier.
Always follow the "finger-tight" rule. Twist the bulb until it stops naturally and you feel firm resistance. Do not apply extra torque to lock it down. Over-torquing cracks the plastic socket housing, instantly destroying the IP rating and allowing water to enter the electrical channel. A finger-tight seal is perfectly sufficient to maintain weatherproofing and electrical connectivity.
Modern pre-lit artificial trees utilize specialized sockets designed to keep bulbs from falling out during storage and setup. These sockets almost always feature a locking mechanism. Before you pull on a dead bulb, inspect the side of the green plastic socket closely. You will typically find a small plastic latch, a hinged clip, or a tiny locking tab securing the base of the bulb to the socket. Attempting to pull the bulb out without disengaging this lock will tear the wires right out of the fixture. Use your fingernail to flip the latch up or press the locking tab inward to release the mechanism.
Once the lock is disengaged, you must extract the bulb safely. Never grab the glass portion of the mini light and pull. The glass envelope is only lightly glued to the plastic husk. Pulling the glass will simply rip the bulb out, leaving the plastic husk and the copper wires jammed permanently inside the socket. This forces you to dig the husk out with a pick, which usually destroys the socket.
Instead, use the pinch-and-pull method. Reach underneath the flared lip of the green plastic husk with your thumb and index finger. Pinch the plastic base firmly. Pull straight out, away from the socket, in one smooth motion. Wiggling the base side-to-side aggressively can bend the delicate internal pins of the socket. A firm, straight pull ensures the husk slides out cleanly along with its attached copper wires.
When you extract the dead bulb, you will notice two tiny copper wires protruding from the bottom of the plastic husk and folded up tightly against the sides. To reuse this proprietary husk, you must rebuild the assembly carefully.
Use your fingernail to straighten the two copper wires on the dead bulb so they point straight down.
Grasp the glass bulb and pull it straight up and out of the plastic husk. Discard the dead glass.
Take your new replacement bulb from the spare bag and straighten its wires.
Thread the two wires through the two tiny holes at the bottom of your original, proprietary husk.
Pull the glass bulb down until it seats firmly inside the plastic base.
Fold the two copper wires tightly up against the exterior sides of the husk, matching the exact path of the original bulb.
Push the rebuilt husk back into the tree socket and engage the plastic locking latch.
These exposed wires are what make contact with the metal plates inside the tree's socket. If the wires are loose or misaligned, the bulb will not light.
Manual bulb replacement is highly effective for maintaining displays, but there is a definitive threshold where repair is no longer viable. You must evaluate the overall condition of the light string before investing hours into swapping individual bulbs. Inspect the wiring insulation. If the green or white plastic coating feels brittle, cracks when you bend it, or exposes bare copper wire, the strand is a severe fire hazard and must be discarded immediately. Do not attempt to wrap cracked wires in electrical tape for outdoor use.
Consider the failure rate. A general rule of thumb in the field is the 20% threshold. If more than 20% of the bulbs on a single strand are dead or heavily blackened, the internal electrical resistance of the strand has likely been compromised. The time spent sourcing individual replacements, testing sockets, and rebuilding husks quickly exceeds the cost of purchasing a brand-new, reliable strand.
Brittle or cracking wire insulation exposing bare copper to the elements.
Heavy rust or green corrosion visible inside multiple empty sockets.
More than one-fifth of the bulbs are dead, shattered, or heavily blackened.
The strand repeatedly blows replacement fuses immediately upon plug-in.
If you are constantly battling burnt-out incandescent bulbs year after year, abandoning the old strands in favor of modern LED technology offers a massive return on investment. LED strands consume up to 90% less electricity than traditional incandescent bulbs. This allows you to connect significantly more strands end-to-end without overloading your wall outlets or tripping breakers. You can often run an entire roofline on a single extension cord.
LED bulbs operate completely cool to the touch. This eliminates the risk of melting artificial tree needles or scorching dry foliage outdoors. The solid-state nature of LED diodes means they lack fragile filaments. This drastically reduces the frequency of burnouts caused by physical vibrations from wind or extreme temperature fluctuations. Upgrading eliminates the annual chore of mass bulb replacement and provides a much more reliable display.
Changing holiday light bulbs without relying on destructive metal tools is the absolute safest and most effective method for preserving the lifespan of your seasonal displays. By utilizing proper manual grip techniques, you protect the delicate plastic threading, maintain critical waterproof seals, and eliminate the danger of shattered glass. Take immediate action to restore your display by following these concrete steps:
Unplug your light strand from the wall outlet and verify the primary fuses inside the male plug before touching any bulbs.
Identify your exact socket size and order the matching replacement bulbs to prevent installation damage and voltage mismatches.
Extract stuck bulbs using the manual push-and-twist or pinch-and-pull methods to protect the socket housing from warping.
Lift flattened internal copper contacts gently with a non-conductive wooden toothpick before inserting the new bulb finger-tight.
A: It depends on the construction of the strand. Commercial-grade string lights and pre-lit trees with removable bulbs allow for easy individual replacement. However, many modern retail LED strands feature single-piece, molded-bulb construction to ensure perfect waterproofing. If a molded LED fails, the bulb cannot be removed, but the rest of the strand will usually stay lit.
A: Use a rubber jar gripper pad or a clean silicone baking glove. Wrap the rubber material around the base of the bulb to maximize your hand's friction. Apply gentle downward pressure to disengage the corroded threads, then twist counter-clockwise. This provides massive gripping power without applying concentrated crushing force to the glass.
A: A C7 bulb utilizes an E12 (12mm) base, while a C9 socket requires an E17 (17mm) base. The C7 bulb is physically too small and will simply fall out of the C9 socket. It cannot engage the threads or touch the electrical contacts, meaning it will never conduct electricity or light up.
A: Immediate burnout usually indicates a severe voltage mismatch. Mini lights operate in a series circuit, meaning the total voltage is divided among the bulbs. If you insert a 2.5V bulb into a strand designed for 3.5V bulbs, the excess power instantly vaporizes the filament. Always check the tag on the plug to verify the exact voltage required.
A: If an entire strand or exactly one-half of a strand goes completely dark simultaneously, a blown fuse is the most likely cause. Individual bulbs usually burn out one at a time. Unplug the strand, slide open the small door on the male plug, and visually inspect the tiny glass fuses for a broken internal wire or black scorch marks.


